Kenmore Series 600 Dryer Manual: A Comprehensive Guide
This manual details the Kenmore Series 600 dryer, offering insights into maintenance, repair kits (like 4392067), and parts lists for optimal performance and longevity.
Understanding Your Kenmore Series 600 Dryer
Your Kenmore Series 600 dryer is a reliable appliance designed for efficient clothes drying. This model, often associated with Whirlpool components as indicated by spare parts lists like those for the AWG 274, utilizes both timed and moisture sensor drying cycles. Regular maintenance, including lint filter and duct cleaning, is crucial for optimal performance and safety.
Understanding the dryer’s features, such as the idler pulley (part number W10837240 in some repair kits), aids in troubleshooting common issues like noisy operation or failure to start. Familiarize yourself with potential error codes and their meanings, as well as the location of key parts like the thermal fuse and heating element. Proper care extends the dryer’s lifespan, preventing the need for frequent repairs or replacements.

Model Number Identification
Locating your Kenmore Series 600 dryer’s model number is essential for accessing the correct parts, manuals, and support information. This number, crucial for ordering replacement components like those found in complete maintenance kits (4392067), is typically found on a label inside the dryer door frame or on the back panel.
The model number often resembles a series of letters and numbers, uniquely identifying your specific dryer configuration. When referencing spare parts lists – such as those for Whirlpool AWG 274 dryers – or contacting customer service, having this number readily available ensures accurate assistance. It’s also vital when consulting online resources or troubleshooting guides to confirm compatibility with your appliance. Accurate identification streamlines repairs and maintenance.
Safety Precautions
Prioritize safety when operating and maintaining your Kenmore Series 600 dryer. Always disconnect the dryer from the power supply before performing any maintenance or repairs, preventing electrical shock. Never operate the dryer if it’s damaged, particularly the exhaust vent, to avoid fire hazards.
Ensure proper ventilation; a clogged lint duct can cause overheating and potential fires. Regularly clean the lint filter after each load, and inspect the exhaust vent frequently. Do not dry items that have been soaked in flammable substances. Keep the surrounding area clear of combustible materials. If you encounter unusual noises or malfunctions, immediately stop using the dryer and consult a qualified technician. Following these precautions ensures safe and reliable operation.
Dryer Features and Controls
The Kenmore Series 600 dryer boasts a range of features designed for efficient and convenient clothes drying. Key controls include a cycle selector dial offering various settings for different fabric types – delicate, permanent press, and heavy duty. Moisture sensors automatically detect when clothes are dry, preventing over-drying and saving energy.
Additional options may include timed dry settings, wrinkle shield options, and temperature controls. The control panel provides clear indicators for cycle status and remaining time. Understanding these features allows you to customize drying cycles for optimal results and garment care. Refer to the operating instructions for detailed explanations of each control and its function.
Operating Instructions

Proper operation involves loading clothes, selecting appropriate cycles, utilizing options like moisture sensors, and understanding start/pause and cancel functionalities for best results.
Loading and Unloading the Dryer
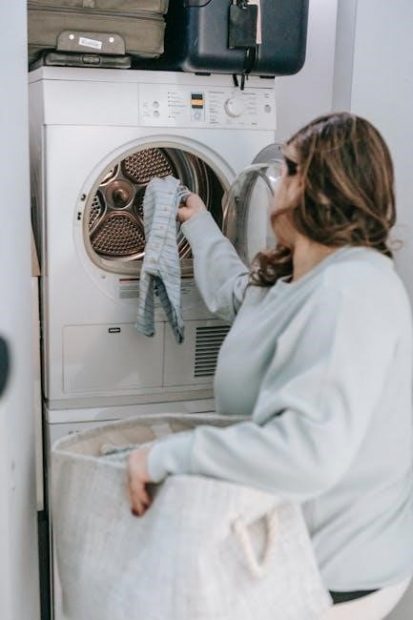
Before each use, ensure the dryer drum is empty of any previous loads. Load items loosely to allow for proper tumbling and airflow; avoid overloading, as this reduces drying efficiency and can cause wrinkling.
Separate items by fabric type and weight – heavier items like towels should be dried separately from lighter items like delicates. Check pockets for any objects (coins, keys, etc.) that could damage the dryer or clothing.
After the drying cycle is complete, promptly remove clothes to prevent wrinkles. Shake out each item before folding or hanging. Regularly inspect the dryer drum for any small items that may have become lodged.
Selecting the Right Drying Cycle
The Kenmore Series 600 dryer offers a variety of cycles tailored to different fabric types. For everyday loads like cottons and linens, utilize the ‘Normal’ or ‘Regular’ setting. Delicate fabrics, such as lingerie or synthetics, require the ‘Delicate’ or ‘Low Heat’ cycle to prevent damage.
Bulky items like comforters or blankets benefit from the ‘Bulky/Sheets’ cycle, providing extended drying time and gentle tumbling. A ‘Timed Dry’ option allows for customized drying durations, ideal for specific needs.
Always consult the garment’s care label for specific drying instructions. Utilizing the incorrect cycle can lead to shrinking, fading, or damage to your clothes.
Using Dryer Options (e.g., Moisture Sensor, Timed Dry)
The Kenmore Series 600 dryer provides enhanced control with options like the moisture sensor and timed dry. The moisture sensor automatically detects when clothes are dry, preventing over-drying and saving energy. This is ideal for everyday loads and helps preserve fabric quality.
Alternatively, the ‘Timed Dry’ option allows you to manually set the drying time, useful for specific items or when a precise drying duration is needed.
Explore additional settings like ‘Wrinkle Shield’ to minimize creases, or adjust the temperature for delicate fabrics. Understanding these options maximizes drying efficiency and protects your clothing.
Start/Pause and Cancel Functions
The Kenmore Series 600 dryer features intuitive Start/Pause and Cancel functions for convenient operation. Pressing the ‘Start’ button initiates the selected drying cycle. Should you need to temporarily halt the process, simply press ‘Pause’. The dryer will retain its settings, allowing you to resume where you left off.
If you need to completely stop a cycle mid-operation – perhaps to add or remove items – utilize the ‘Cancel’ function. This will immediately terminate the current cycle and clear the dryer drum.
Always ensure the drum has completely stopped before opening the door, even after using the ‘Cancel’ function, for safety.

Maintenance and Cleaning
Regular cleaning of the lint filter, duct, and cabinet ensures optimal performance and safety for your Kenmore Series 600 dryer, preventing potential hazards.
Cleaning the Lint Filter
The lint filter is crucial for maintaining your Kenmore Series 600 dryer’s efficiency and safety. A clogged filter restricts airflow, leading to longer drying times, increased energy consumption, and a potential fire hazard.
Locate the lint filter, typically inside the dryer drum near the door opening. After each load, remove the filter and gently pull off the accumulated lint. For a more thorough cleaning, wash the filter with warm water and a mild detergent every few months.
Ensure the filter is completely dry before reinstalling it. A damp filter can cause issues. Inspect the filter housing for any lint buildup and clean it as needed. Regularly cleaning the lint filter contributes significantly to the dryer’s performance and longevity, preventing costly repairs and ensuring safe operation.
Cleaning the Lint Duct
Beyond the lint filter, the dryer’s lint duct requires periodic cleaning to maintain optimal airflow and prevent fire hazards. Lint accumulates within the ductwork, reducing efficiency and posing a significant safety risk.
Disconnect the dryer from the power source before beginning. Locate the lint duct – typically a flexible or rigid hose connecting the dryer to the exterior vent. Carefully detach the duct from both the dryer and the wall.
Use a vacuum cleaner with a hose attachment or a specialized lint brush to remove accumulated lint from inside the duct. Inspect the duct for any damage or kinks and replace it if necessary. Reconnect the duct securely, ensuring a tight seal. Regular duct cleaning, ideally annually, is vital for safe and efficient dryer operation.
Cleaning the Dryer Cabinet
Maintaining a clean dryer cabinet extends the appliance’s lifespan and ensures hygienic operation; Dust and debris can accumulate on interior surfaces, potentially affecting performance and air quality.
Always disconnect the dryer from the power supply before cleaning. Use a soft, damp cloth with mild detergent to wipe down the interior surfaces of the cabinet. Avoid abrasive cleaners, as they can damage the finish.
Pay particular attention to areas around the drum and any accessible vents. For stubborn stains, a paste of baking soda and water can be gently applied. Ensure the cabinet is thoroughly dried before reconnecting the dryer. Regular cabinet cleaning, alongside lint filter and duct maintenance, contributes to a safe and efficient appliance.
Inspecting and Cleaning the Exhaust Vent
A clean exhaust vent is crucial for dryer safety and efficiency. Restricted airflow from a clogged vent poses a fire hazard and increases drying times. Regularly inspect the entire vent system, from the dryer connection to the exterior outlet.
Disconnect the vent from both the dryer and the wall. Use a vent cleaning brush kit or a vacuum cleaner with a long hose attachment to remove lint buildup. Ensure all sections of the vent are clear of obstructions.
Check the exterior vent flap to confirm it opens and closes freely. A blocked exterior vent can cause moisture to accumulate. Cleaning the exhaust vent annually, or more frequently with heavy use, is highly recommended for optimal performance and safety.

Troubleshooting Common Issues
Addressing problems like a dryer not starting, failing to heat, or making unusual noises is vital; repair kits (4392067) can help resolve these issues.
Dryer Not Starting
If your Kenmore Series 600 dryer fails to start, several potential causes should be investigated. First, ensure the dryer is properly plugged into a functioning electrical outlet, verifying voltage supply. A tripped circuit breaker or blown fuse is a common culprit and requires resetting or replacement.
Next, check the door switch; the dryer won’t operate if the door isn’t securely closed. Inspect the thermal fuse, as a blown fuse prevents operation – replacement is often necessary. Consider the dryer belt; if broken, it can prevent the drum from turning, halting the start process. Repair kits, such as the 4392067, often include replacement parts like the idler pulley, which can contribute to starting issues.
Finally, a malfunctioning timer or control board could be the root cause, requiring professional diagnosis and potential replacement.
Dryer Not Heating
When your Kenmore Series 600 dryer isn’t heating, the issue often lies within the heating components. A frequent cause is a blown thermal fuse, designed to protect against overheating; replacement is typically required. Inspect the heating element for breaks or damage – a faulty element won’t generate heat.
Also, examine the gas valve (for gas dryers) or the igniter, ensuring they are functioning correctly. A malfunctioning gas valve prevents gas flow, while a faulty igniter won’t spark the gas. Check the thermostat, which regulates temperature; a defective thermostat can prevent heating.
Repair kits, like 4392067, may include some of these components. Remember to disconnect power before inspecting any electrical parts and consult a qualified technician if you’re uncomfortable with these repairs.
Dryer Making Unusual Noises
Unusual noises from your Kenmore Series 600 dryer often indicate mechanical issues. A common culprit is a worn-out idler pulley (like W10837240 in repair kit 4392067), causing squealing or grinding sounds during drum rotation. A failing drum support roller can also produce similar noises.
If you hear thumping, check for obstructions in the drum, like shoes or coins. A worn dryer belt can slap against the sides, creating a flapping sound. Inspect the blower wheel for debris or damage, as this can cause a whistling or roaring noise.
Loose cabinet panels can rattle during operation. Regularly cleaning the lint filter and duct helps prevent airflow restrictions that can strain components and contribute to noise. If the noise persists, professional diagnosis is recommended.
Clothes Taking Too Long to Dry
If your Kenmore Series 600 dryer is taking an extended time to dry clothes, several factors could be at play. A clogged lint filter is the most frequent cause, restricting airflow and reducing drying efficiency. Ensure the lint filter is cleaned before each load. A blocked lint duct also significantly impacts performance; regular cleaning is crucial.
Check the exhaust vent – obstructions here severely limit airflow. Overloading the dryer prevents proper tumbling and air circulation. Verify you’re selecting the appropriate drying cycle for the load type and size.
A malfunctioning heating element or thermal fuse can prevent the dryer from reaching optimal temperatures. If issues persist, professional inspection is advised to diagnose potential component failures;

Parts and Repair Information
Locate key components like belts, thermal fuses, and heating elements for your Kenmore Series 600 dryer; repair guides and parts lists are essential.
Identifying Key Dryer Parts
Understanding the core components of your Kenmore Series 600 dryer is crucial for both maintenance and potential repairs. Essential parts include the dryer belt, responsible for rotating the drum, and the thermal fuse, a safety device preventing overheating. The heating element generates the heat for drying, while the idler pulley ensures smooth belt operation.
Furthermore, the lint filter prevents debris from accumulating, and the lint duct channels it away. The control board manages the dryer’s functions, and the motor powers the drum rotation. Identifying these parts, often listed in spare parts lists (like those for Whirlpool AWG 274 dryers with over 100 individual parts), allows for targeted troubleshooting and efficient replacement when necessary.
Accessing a comprehensive parts manual is highly recommended for accurate identification and ordering.

Replacing the Dryer Belt
A broken dryer belt prevents drum rotation, a common issue addressed with replacement. First, disconnect power! Access the belt typically involves removing the front panel or a rear access panel. Locate the old belt, noting its routing around the drum, motor, and idler pulley.
Carefully remove the old belt, then install the new one, ensuring it’s correctly seated in all grooves. Proper tension is vital; the idler pulley often provides this. Reassemble the dryer, ensuring all panels are securely fastened.
Repair kits, such as the 4392067, often include a replacement belt alongside other wear parts. Consult a parts diagram (like those for Whirlpool dryers) for precise placement and routing guidance.
Replacing the Thermal Fuse
The thermal fuse is a safety device preventing overheating; a blown fuse stops the dryer. Always disconnect power before any repair! Locate the thermal fuse – typically near the exhaust vent or heating element housing. Access usually requires panel removal.
Disconnect the wires connected to the old fuse. Note their positions for correct re-connection. Remove the old fuse and install the new one, ensuring it’s the correct amperage rating. Secure the wires firmly.
A blown fuse indicates a potential airflow restriction; inspect the vent duct for lint buildup. Repair kits (like 4392067) may include a new fuse. Refer to a parts diagram for precise location and wiring configuration.
Replacing the Heating Element
Disconnect power before starting! The heating element provides the dryer’s heat; a faulty one results in no heat. Access requires removing the dryer’s front panel and potentially other components. Carefully disconnect the wires connected to the heating element, noting their positions for reassembly.
Remove the old heating element, often secured with screws or clips. Install the new element, ensuring it’s properly seated and secured. Reconnect the wires exactly as they were before.
Repair kits (like 4392067) might not include the heating element, so verify part compatibility. Inspect the element housing for obstructions. A blown thermal fuse often accompanies a failed heating element, so consider replacing both.
Advanced Troubleshooting
Decoding error codes, checking voltage, and testing the timer/control board are crucial for complex issues, alongside gas dryer specifics if applicable.
Error Codes and Their Meanings
Understanding Kenmore Series 600 dryer error codes is vital for pinpointing malfunctions. While specific codes vary by model, common indicators signal issues. For instance, a code might relate to a heating element failure, requiring replacement. Others could point to problems with the thermal fuse, gas valve (on gas models), or the control board itself.
A flashing light, often accompanied by a numerical or alphanumeric code displayed on the control panel, initiates the diagnostic process. Referencing a comprehensive parts list, like those available for Whirlpool AWG 274 dryers (sharing components), can aid in identifying the faulty part. Remember to disconnect power before any inspection or repair. Detailed troubleshooting guides, often found online, correlate specific codes with recommended solutions, ensuring safe and effective repairs.
Checking the Voltage Supply
Before undertaking any repairs on your Kenmore Series 600 dryer, verifying the voltage supply is crucial for safety and accurate diagnosis. A consistent and correct voltage is essential for proper operation. Use a multimeter to test the voltage at the dryer’s outlet, ensuring it matches the dryer’s specifications – typically 240V for electric models.
Low voltage can cause a range of issues, including the dryer not heating or starting. Check the circuit breaker or fuse box to confirm the breaker hasn’t tripped or the fuse hasn’t blown. A faulty wall outlet can also be the culprit, necessitating replacement. Always disconnect the dryer from power before testing and consult a qualified electrician if you are uncomfortable performing these checks.
Testing the Timer/Control Board
The timer or control board is the brain of your Kenmore Series 600 dryer, orchestrating all functions. Testing requires caution and a multimeter. First, disconnect power! Visually inspect the board for burnt components or damaged wiring. Use the multimeter to check for continuity across key components, following the wiring diagram (often located inside the dryer).
A faulty timer/control board can manifest as erratic cycles, failure to start, or incorrect heating. Testing individual functions, like the start relay, can pinpoint the issue. If you lack experience with electrical testing, it’s best to consult a qualified appliance repair technician. Replacement is often necessary if significant faults are detected, ensuring proper dryer operation.
Gas Dryer Specific Issues (if applicable)
If your Kenmore Series 600 dryer utilizes gas, several unique issues may arise. A common problem is a faulty gas valve, preventing ignition and resulting in no heat. Always ensure the gas supply is safely shut off before any inspection. Check the igniter for proper glow; a weak or absent glow indicates a potential igniter failure.
The flame sensor is crucial; if it doesn’t detect a flame, the gas supply will be cut off as a safety measure. A clogged burner can also cause issues. If you smell gas, immediately ventilate the area and contact a qualified gas appliance technician. Never attempt repairs involving the gas line without professional expertise.

Warranty Information
Kenmore dryer warranties cover defects in materials and workmanship for a specified period; claims require proof of purchase and adherence to outlined procedures.
Kenmore Dryer Warranty Details
The Kenmore Series 600 dryer warranty typically offers coverage for one year from the date of purchase against manufacturing defects in materials and workmanship. This includes parts and labor for repairs deemed necessary by Kenmore. However, the warranty does not cover issues arising from improper installation, misuse, abuse, or normal wear and tear.
Specifically, components like the dryer belt, lint filter, and cabinet are often excluded from full warranty coverage due to their consumable nature. Extended warranties may be available for purchase, providing additional protection beyond the standard one-year period. To initiate a claim, retain your original purchase receipt and contact Kenmore’s customer service department for guidance on authorized service centers and claim submission procedures.
How to Submit a Warranty Claim
To submit a warranty claim for your Kenmore Series 600 dryer, first gather your original proof of purchase – the receipt or invoice – and the dryer’s model number. Contact Kenmore’s customer support via their website or dedicated phone line; details are usually found within the product documentation.
Be prepared to describe the issue you’re experiencing with the dryer in detail. Kenmore may request photos or videos to aid in diagnosis. They will then guide you through the process, potentially authorizing a repair at a designated service center or providing instructions for a self-repair with reimbursement for parts. Keep all communication records and repair documentation for your claim file.